I wrote this Tutorial, any resemblance to others is purely a coincidence. Please do not add this to any Forum, Group or Website.
This pretty scrapkit is called :" Minty Frost " and is by Blackwidow Creationz and can be found Here
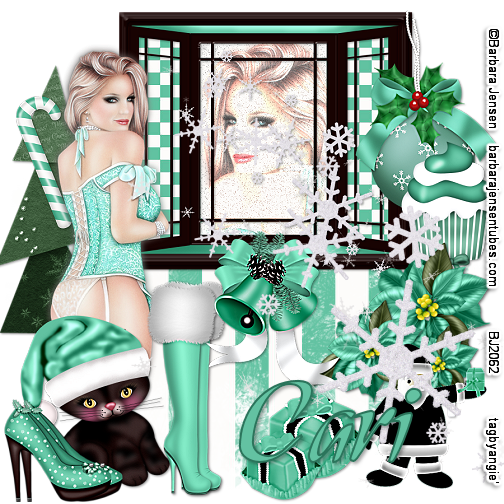
The Tube I am using is by Barbara Jensen and can be found Here
You'll need
2 tubes, A big one and smaller one.
Drop Shadow = DS - 2,2,50,5,black
Let's Begin
900 X 900
1.) `EL.20 - Copy and Paste = C&P as New Raster Layer = NRL.-place in center of tag.
2.) With Magic Wand - add shift- (Ex.1) click in all 3 sides- you might have to do it a few times.
3.) P. 2 or 1 of your choice..- C&P as NRL -place over frame - invert and delete- select none = SN - move layer below frame - DS - both , I used 2 papers...for the whole frame- Tag reference = TR..
4.) Close up tube - C&P as NRL - place her in center frame - duplicate= dup. - Gaussian blur - 6 - Blend Mode= BM = multiply- opacity = OP = 75% -- merge down = MD - DS -
5.) EL. 14 - C&P as NRL - place on bottom right of frame - DS - dup.- Resize = R - 75% - unsharp mask = USM -place on left of 1st flower - dup. R.- 80% sharpen = Sh- place on right of main-flower- Tag Reference = TR
6.) EL. 11 - C&P as NRL - place on bottom left - DS & TR
7.) 2nd - Tube - C&P as NRL place it on left center-dup. - blur-Gaussian 6 - BM= soft light - OP= 100 - MD - DS & TR - move layer below the kitty layer.
8.) EL. 2 - R = 65% - USM - C&P as NRL - place on top right - DS & TR
9.) El. 13 - C&P as NRL- place layer above frame layer - DS & TR
10.) EL. 25 - C&P as NRL - place this layer below 2nd tube layer - DS & TR
11.) EL. 12 - R= 60% -USM - C&P as NRL - place on bottom right corner - DS & TR
12.) EL. 17 - R = 45 % USM - C&P as NRL- place on left side center -half way down - on tree- move layer below 2nd tube layer -DS & TR
13.) EL. 28 - R= 75% -USM - C&P as NRL - place next to kitty - DS - dup.- move this one to the right a little - so it sees that your are looking at 2 of them - TR
14.) EL. 29 - R= 60% -USM - C&P as NRL - place on bottom of frame - DS & TR
15.) El.31 - C&P as NRL - place on right center - DS & TR - move layer below flowers on tag .
16.) EL. 32 - R = 60% USM. - C&P as NRL - place on bottom right - DS - dup. R=80% - place it next to other one- TR
17.) EL 35 - R - 50% & 80% -USM - C&P as NRL- place on bottom left - DS --and move this one up a smidge - so it looks like 2 shoes.- TR
18.) EL. 23 - C&P as NRL - place wherever you want your snowflakes - DO NOT DS - TR
19.) Close bottom layer - Merge Visible = MV - R= 56% - sharpen ( if needed)
20.) Add paper of your choice to bottom, then add a mask - delete mask - ungroup layers - (crop if needed [opaque]) MV
Add all Copy Right Info an your Name.
Save as PNG.
Thank you for keeping up with me.
Hugs
Angie
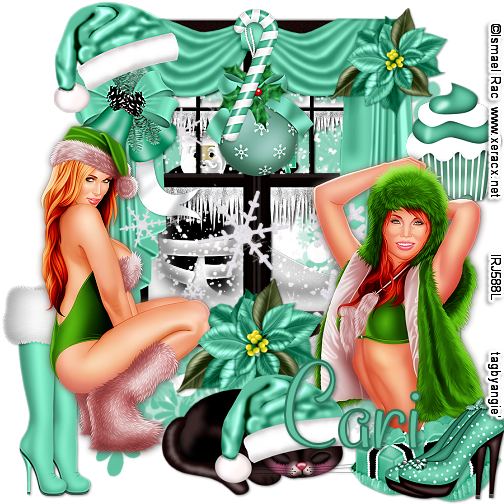
