Tuesday, December 29, 2015

Silver Bells 2 PTU

I wrote this Tutorial, any resemblance to others is purely a coincidence.
Please Do Not add this to any Forum, Website or Group.
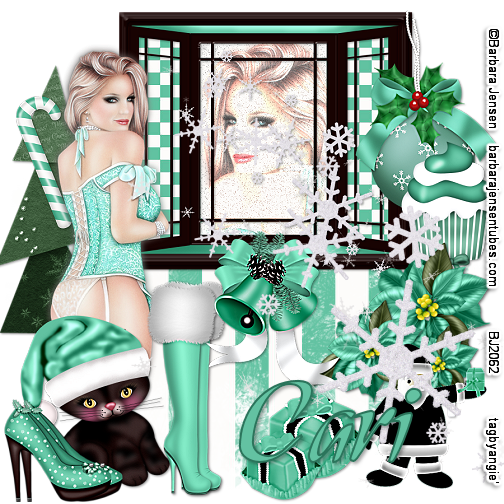
The kit I am using is by Cari at Black Widow   Creationz it's called " Silver Bells 2 " You can find it Here
The Tube I chose is by Jasmine Beckett-Griffith and can be found Here
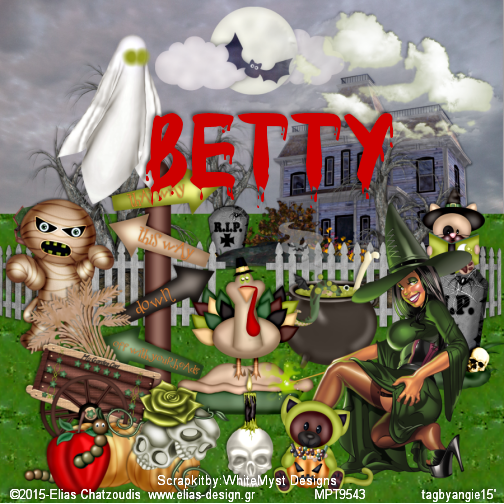
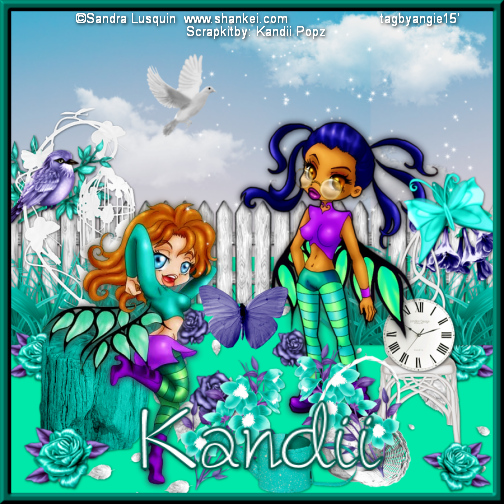
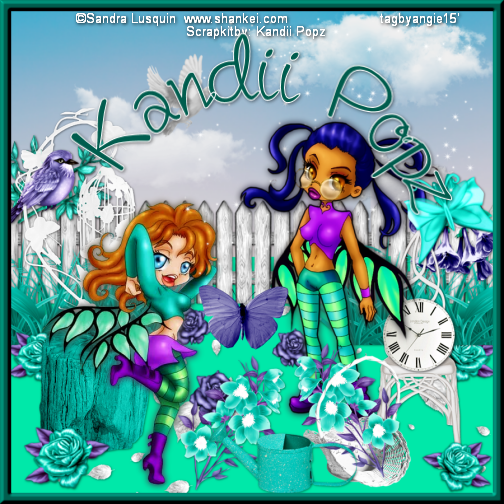
My Examples -Here
( Just scroll down )
Filter : VDL Adrenaline
Drop Shadow = DS = 2,2,50,5 black
Let's begin
900 X 900
1.) Tube - (resize = R -  if needed ) Copy and Paste = C&P as New Raster Layer = NRL - and place on the bottom of tag - (we're going to work around the tube ) DS
2.) EL 11 - C&P as NRL - Place on top right corner-- DS
3.) EL 12 - C&P as NRL - place on the bottom of your moon, making it look like it's hanging off...DS
4.) EL 14 - C&P as NRL - place on upper left and move layer to above bottom - DS
5.) EL10--R= 70% - Unsharp Mask = USM -C&P as NRL - place on bottom right corner - DS
6.) EL 21 - C&P as NRL - free rotate left 90% - Place on bottom of tag - DS & Tag reference = TR
7.) EL 23 - R = 70% - USM -C&P as NRL - place on top left - free rotate left 25% - DS - Duplicate - mirror- move this to other side of star- duplicate and flip - move layer below tube- duplicate #2 - mirror - make sure bottom 2 are under the tube, and above the star - TR - merge them all together -
8.) EL 24 - R= 70% & 80% - USM --C&P as NRL - Place on left side - move layer below frame (NO DS) - TR
9.) EL 25 - R = 60% & 80% - USM -C&P as NRL -  place it above the tree on right side - DS
10.) EL 29 - -C&P as NRL - Place on right side bottom- DS - Move layer below tube - TR
11.) EL 33 - -C&P as NRL -  Place on left side - DS - move layer below tube layer - TR
12.) EL 34 -  -C&P as NRL - place on right top - move layer below tree layer - DS & TR
13.) EL 36 - R = 60% - USM - -C&P as NRL -- place  on top left - move layer below star - (NO DS) Erase any over hanging (for animation)
14.) EL 4 --C&P as NRL -place behind sign - DS & TR
15.) EL 45 - R = 40% USM - -C&P as NRL - place on left side bottom - DS & TR
16.) EL 5 - -C&P as NRL - place in front of sign - DS & TR
17.) Close out all layers above sky- and close off bottom layer -  You should have - leaves, star, snowman and tree -  with freehand selection tool - Point to point -  add shift - feather 0 - smoothing 0 -  go around the star- Examples 1,2,3
18.) Go around star and on bottom layer add NRL-
with flood fill tool- add this color - 93aaca ( rename this background ) Duplicate 3 X's = 4 - select none- close out all layers from leaves to bottom
19.) With all layers above - open then Merge Visible --rename Top
20.) Add Copy right info (If you don't want to animate- merge visible all layers, R= 56% = 504 X 504-sharpen - add name and save as PNG )
Let's animate
21.) Close top and open Leaves, star, snowman and tree - Merge Visible and rename it Star- R = 56% - 504 X 504 - sharpen
A.) rename star background 1,2,3,4- with freehand selection tool - same setting as before - go around star again this time keep it selected.. make sure star background 2,3, & 4 are closed.. working on Star background (St.bkg) 1 - go to VDL Adrenaline - snowflakes - Ex.4 - Amt. 100 - size range - Beg.=7, end = 22 - hardness = 80 - Transparency = 20 - basic snow - random seed - 0
close St.bkg 1 open #2 - random seed = 20 , close #2 open #3 - random seed =40 - close #3 - open #4 - Random seed = 60 , Select none....
close #' s 2-
Open Animation Shop
on #1 - copy merged - in AS -paste as new animation
PSP - close #1, open #2 - in AS - paste after current frame - repeat for #3 and #4 - when done, go to 1st frame - edit- animation properties - opaque = white
and then frame properties - 35 -for all frames
save as GIF after you add your name.
Thank you for following me.. I really would like to see any creations.
Hugs
Angie


Saturday, December 19, 2015

Pastel Goth PTU

I wrote this Tutorial any resemblance to others is purely a Coincidence.  Please do NOT add this to any Website, Forum or Group without my Permission..
This awesome Goth kit called "Pastel Goth" is by Kandii Popz and you can find her kits Here
The tube is by Igolochka and can be found on her deviantart site Here
Drop Shadow = DS = 2,2,50,5 black
Let's begin
900 X 900
1.) Resize = R- (Tube -if needed) - Copy and Paste = C&P - as a New Raster Layer = NRL = place in Center of  canvas.
 Duplicate = dup. - tube - Gaussian blur-6- Blend mode = soft light - opacity = 100 - merge down =MD - rename tube - Tag Reference = TR - DS
2.) Bow 2 - R = 80% - sharpen - C&P as a NRL- place bottom left of tube - free rotate - left -25 - DS & TR
3.) Heart Blade - R= 65% - Unsharp Mask = USM - C&P as a NRL - place on top left side - free rotate right 25 - DS & TR
4.) Boots - R = 65% - USM - C&P as a NRL - mirror - place on right side bottom - DS & TR
5.) Bones - C&P as a NRL - move layer on top of tube...DS
6.) Chain Fence - C&P as a NRL - place on top of bottom layer - move slightly left and a little lower - TR - NO DS
7.) Candle - C&P as a NRL - place bottom left - DS - TR
8.) Chocker - R= 50% USM - C&P as a NRL - place on top of boots - free rotate Left 20 - DS & TR
9.) Eyeball N Bones - R=80% - USM -C&P as a NRL - Place right side of tube and move it below the tube layer - DS & TR
10.) Drips - C&P as a NRL - rename - Drips 1 - Move to top left - TR - NO DS ( will animate this later)
11.) Cupcake - R = 70% & 80% - USM - C&P as a NRL - place on bottom , next to boots - DS - Dup. and mirror - TR &  MD
12.) Glitter - C&P as a NRL - place below chain layer - move up a little -- NO DS - TR
13.) Glitter Bits - C&P as a NRL - move to right side of tag - move layer right below tube layer- TR - NO DS
14.) Skull Hand - C&P as a NRL - Place on top chain fence - move layer to right above chain- DS & TR
15.) Kitty - R = 60% - USM - C&P as a NRL -Place on center bottom between the cupcakes - DS & TR
16.) Skull 1 - rename layer - (in case you animate) - R  = 60% USM -C&P as a NRL- Place on top center - DS & TR
17.) Resize all layers 56% = 504 X 504
18.) Paper 14 - C&P as a NRL - place on bottom layer - add mask - delete mask - and ungroup layers -
19.) Keeping bottom layer closed, close out all layers above the tube layer - now with tube layer and all the ones below -  Merge Visible - rename tube
20.) Open all the other layers- keeping Skull 1, the Drips 1 , and bottom layer closed. Now close tube.
  Merge Visible and rename top
21.) Now you should have Skull 1, Drips1, Tube and bottom
22.) Now add all Copy right info and your name if your not going to animate, go ahead and merge all visible.. save as PNG.
If your going to animate follow me.
Duplicate Drips 1 , 5X's = 6
rename them 1-6
close all layers but 1 & 2, move layer 2 down, keeping it aligned with #1.. do this for all 6 layers...when happy close them all but 1
Open Animation shop
here is where we get tricky, so follow if you can....Good Luck, I was confused too...lol
Copy merged and paste= CMP into Animation Shop = AS
Opacity = OP
1 -- CMP into AS as New animation = Op =100
2 --==OP=100 / #1 = 80 /CMP after current frame
3 --== OP= 100 / #2 = 80 / #1 =60 / CMP after current frame
4 --==OP = 100/ #3 = 80 / #2 = 60
/#1 = 40 / CMP after current frame
5 --== OP = 100 / #4 = 80 / #3 = 60 / #2 = 40 / #1 = 20 / CMP after current frame
6--==OP = 100 / #5 = 80 / #4 = 60 / #3 = 40 / #2 = 20 / #1 = 0 /CMP after current frame
when your done you will need to click on 1st frame and edit all, then frame properties = 45
go to animation properties and choose - opaque - white.
when your happy add name and save as GIF..
example below, I hope you understood this, I would really like to see your results, just email them to me..
Hugs
Angie


Saturday, November 14, 2015

Mr. and Mrs. Samuel Leggett (We Miss Ya'll)

 photo mnd_zpsizlofvgu.png
Here are Our Parents, and I mean " Our's  ' There are nine of us, Yes , I said 9.. When Mom and Dad married, it was his 2nd marriage " he was a widower"  and her 3rd, she married her 1st husband twice but we don't count that one time.. and our oldest brother wasn't around for reasons of his own, so Mom and Dad raised 7 of us, you ask, but you said 9, and you've only shown 8, David , our wayward brother, is #9.. we all had to get along, David was 16 and spent 95% of his time at his friends, I think he only came over to torture us, lol.. I love you big Bro...
And they raised a Grand - Daughter
Mom and Dad joined hands on September 5, 1973.. they were married, 37 years, we were raised with Love, even when sometimes we didn't think so.. It really must have been hard on them when at one time , they had 5 teenagers, to raise...we were spanked with a belt, now don't go saying anything, no use sending us to our rooms, that was where all our things were... we got spanked and then was sent to our room, where we didn't play with our things, we were too busy rubbing our butts and reflecting on what we did wrong, and then revenge...lol
They have / Had:
Grand - Children  = 22
Great-Grand-Children = 22
Great-Great- Grand - Children = 2
yep ,we are , a large family  - and will get larger...
Dad passed away, October 14. 2010 (5 Years)
Mom passed away, November 30, 2014 (1 Year, this month)
When we meet again.
You are not here for me to hold, though you are never far from me. You live in my heart and my Memories. and I , know we will see each other again, that is a promise our Father in Heaven told us.
We will continue to tell our children and Grand - Children how Momma chased Pokey down the road one Christmas Morning ( after he and David were told to quit shooting water guns in the house), the last time we were all together for a Holiday..1986
The next time we were all together was October 2010, then Dad died. And we had to bury our 1st love one.. next time was last year, when Mom died.  You never know how much you really miss someone ,until they are gone. You both may be gone, but never forgotten.
Sleep well till we see each other, again
I love ya'll
Angelia


EMO Cat PTU

 photo emocatcari_zps2zoujv5o.png
I Wrote this Tutorial, any resemblance to others, is purely coincidental. Please DO NOT add this to any Website, Forum or Group.
This Cute Scrap kit was made by Black Widow Creationz named "EMO CAT" and you can buy her kits Here
And the Tube is by Keith Garvey You can find them in his store Here 
Ok Let's get started..
Drop Shadow = DS = 2,2, 50, 5, black
900 X 900
1.) EL 26 - Copy an Paste = C&P as New Raster Layer = NRL - Place in Center
2.) With your Magic Wand, click in all 3 squares. Select- modify expand 12.
3.) PP2 - or one of your choice - C&P as a NRL- invert and delete - Select None = sn  - move this below the frame - DS both
4.) I find it is easier to do the next few steps, I close all layers but the frame. Take your Magic Wand, and click in 1st sq. -  sel.- mod. 12 add tube - invert -  delete -DS -  move tube below frame, and continue with the other sq.'s.
5.)EL 28 - C&P as NRL- Place below frame- move layer to upper right-- DS - Duplicate = Dup.- mirror - flip - Merge down = MD
 6.) EL. 16 - Resize = R = 80% sharpen = Sh.- C&P as NRL-  Place on bottom left - DS
7.) EL. 17 - R = 75% X2 - Unsharp Mask =USM-  free rotate right = 30 - place on top right - DS - Tag Reference = TR
8.) EL. 14 - C&P as NRL - Place on top left - DS-
Move layer below frame
9.) EL. 10 - R = 80% X2 - USM -C&P as NRL- place on bottom right - Dup. flip - erase the stem- top 1 - (TR) MD - free rotate left 30 - DS
10.) EL  R= 80% - C&P as NRL- place on top left - DS & TR
11.) EL. 15 - C&P as NRL - place it on top of bottom left - NO DS - TR
12.) EL.11- R= 80% sh.-C&P as NRL- Place on Ribbon flower - DS -TR- MD - Dup. - R= 80% - place on frame - TR - Dup. and place on bottom-TR
13.) EL. 8 - C&P as NRL- place on right bottom - DS - TR
14.) EL. 6 - R= 80% -SH.-C&P as NRL- place next to bowl- Mirror -DS & TR
15.) EL. 5 - R= 80% SH - C&P as NRL - place on bowl - DS & TR - free rotate -30 left - erase then tail - so it looks like it's in the bowl..
16.) EL. 39 -C&P as NRL -place lower right side- move to above bottom layer - DS
17.) EL. 38 - R = 65% USM - C&P as NRL - place on top right side - DS & TR
18.) EL. 32 - R = 65% USM - C&P as NRL - Place on top left - free rotate left 30 - DS
19.) EL. 33 - R = 75% USM - C&P as NRL - place on lower right side - DS
20.) EL. 3 - C&P as NRL- Place on left bottom - DS & TR - move layer below box
21.) With bottom still closed- merge visible all layers
22.) EL. 1 - C&P as NRL -place on top - Dup. - flip - DO NOT DS - TR- MD
23.) Resize - 56% - sharpen - 504X504
Add paper of choice and add a mask- I used paper 8
When done -Open bottom Layer - Merge Visible all layers- Now all the Copy right info - Name and save as PNG
Thanks for stopping by,
Hugs
Angie


 photo emocatkandii_zpsrhpoxmke.png

Saturday, October 24, 2015

Pin Up Girl PTU

 photo pinupgirlkandii_zpsgf6gd1ys.png
I Wrote this Tutorial, any Resemblance to others is purely a coincidence. Please DO NOT add this to any Website, Forum, or Group's, without my permission. Thanxs
The Tube I chose is by Ismael Rac and you can find it Here
This Awesome girl kit is called " Pin Up Girl " made by Kandii Popz you can find her kits Here
Let's get started
Drop Shadow = DS = 2,2,50,5 black
900 X 900
1.) Frame 3 - Copy and Paste = C&P as New Raster Layer = NRL --  with Magic Wand - click on the inside of frame = Selections - modify - expand 6
2.) P2 - C&P as NRL- Place over the frame, Invert - Delete - Select None = SN - Move paper below frame and add DS to both.
3.) Tube - Resize = R = ( if needed ) - C&P as NRL- Duplicate = dup. - Blur - Gaussian 6 - blend mode - soft light - merge down- DS - dup. move this one below frame - on top tube - go around tube over hanging - and delete - SN -crop opaque - on both tube layers.. making sure it's 900 X 900 , DS Bottom tube -- close bottom layer and merge visible - rename frame
4.) Compact - R =75% - sharpen - - C&P as NRL-place on bottom right- DS & Tag Reference = TR
5.) Eye Pencil  - C&P as NRL- place on right side of compact - DS
6.) Lipstick - R = 75% - sharpen - - C&P as NRL-place on right side bottom, left of the compact - DS & TR
7.) Mascara - R = 75% Unsharp mask = USM - - C&P as NRL- place on left side of tag - DS & TR
8.) Nail Polish - R = 75% USM  - C&P as NRL- place on left side- an move layer below mascara- DS &TR-
9.) Perfume - R = 75% USM  - C&P as NRL- place next to nail polish - DS & TR
10.) Shoes - R = 75% USM  - C&P as NRL- place on bottom center of tag - DS & TR
11.) Sunnies -  - C&P as NRL- place in front of shoes - DS & TR
12.) Ribbon 2 - R = 75% X2 - sharpen- - C&P as NRL- place top right corner - DS & TR - free rotate - right 40 - dup. - R = 80% place above the other- Md and move layer below merged.
13.) Glitter  - C&P as NRL- Place on top of ribbon - move layer above ribbon - dup.- flip - mirror - ( DO NOT DS) - MD
14.) Flying lips - R =75% sharpen  - C&P as NRL- place on top of ribbon - free rotate - right 20 - DS & TR
15.) Bag - R = 70% USM - C&P as NRL- place on left side - DS & TR -move layer below the glitter layer.
16.) Butterfly- R = 70% USM  - C&P as NRL- mirror and place on center - right - DS & TR - dup. R = 70% mirror and place on left center - free rotate - right 20
17.) Now with Bottom layer still closed - Merge Visible all layers - R = 56% =504 X 504 -
P 7 (or one of your choice)  - C&P as NRL- place it above the bottom layer - now add a mask of choice - delete mask- ungroup layers- crop opaque - open bottom layer -MV. all layers
18.) Add all Copy Rights - name and save as png.
Thank you so much for keeping up with me.
Hugs to All
Angie


 photo pinupgirlcari_zps49zv49d5.png


Sunday, October 18, 2015

Falling into Halloween #2 PTU

 photo fallinfoheaven2betty_zpsroy4pkkm.png
I wrote this Tutorial, any Resemblance to others is purely coincidental. Please DO NOT add this to any Website, Group or Forum without my permission.
This cute Halloween kit is called " Falling into Halloween " by WhiteMyst Designs you can find it Here or  Here   
The tube is by Keith Garvey and you can get his tubes Here
Filter used = MuRa's Meister Copies
 
Drop Shadow - 2,2,50,5 black
2 Tubes - 1 close-up , and 1 regular
Let's Begin
900 X900
1.)  Close-up tube - Resize = R = 50% Copy and Paste = C&P as New Raster Layer = NRL ,   place in center - Duplicate = dup. - Blur - Gaussian - 6 -Blend Mode - multiply -  Opacity - 80% - Merge Down = MD.
2.) Go to MuRa's Meister- Copies -  This setting -
Encircle - Circle- Tile Mode - Behind - 10 / 55 / 55 / 0 / 100 / -25 / 100 / 0 / 100 / 0- / 0 / 30-     / 0 .                EX. photo EX_zpsbzmrsx32.png
 

.3.)  With Magic Wand - click inside frame - sel.-modify-expand - 12
4.) P 3 - or one of choice - C&P as NRL -  place over frame - invert -delete - Select None = SN
move paper below frame, and DS- both. - rename Frame
5.) 2nd Tube - R= 80% & 90% - sharpen -  - C&P as NRL - place her in center of frame - dup. - blur - Gaussian 6 - Blend mode - soft light - MD - DS & Tag Reference = TR - move her up a bit
6.) F 4 - - C&P as NRL - place below 2nd tube - DS & TR
7.) E 16 - R - 80% X2- unsharp mask - USM. -- C&P as NRL - place toward bottom of frame- DS- now move layer below frame - Dup. - mirror - dup.- flip- dup. - mirror- place these leaves around frame - TR - I merged mine to save on space
8.)  E 12 - R = 75% sharpen - - C&P as NRL - place on bottom left - DS & TR
9.) E 60 -- C&P as NRL - place on bottom right - DS & TR
10.) WA 1 - R = 60% - USM - - C&P as NRL - place on top left - free rotate - left 30 - DS & TR
11.) E 56 = - C&P as NRL - place on left side - DS & TR - move layer below the pumpkin kitty.
12.) E 57 - R = 60% - USM - - C&P as NRL - place next to pumpkitty-- DS & TR
13.) E 8 - R = 80 X 2 - USM - - C&P as NRL - place on right side next to snowman- DS
14,) E 58 -R = 60% USM - - C&P as NRL -place on left side DS & TR
15.) E 53 - - C&P as NRL - place center top- move layer below frame--DS & TR
16.) E 47 - R = 80% USM -- C&P as NRL - place top right - mirror - DS & TR
17.) E 37 - - C&P as NRL -right center -  move layer right below snowman - DS & TR
18.) E 2 - R= 80%-sharpen- C&P as NRL -place over bat-DS & TR
19.) E 4 - R=80% -sharpen-- C&P as NRL -place over cauldron - DS & TR
20.) E 43 - - C&P as NRL -place behind cauldron - DS & TR
21.) Close bottom layer - merge visible all layers -R = 56% sharpen -Paper 1 - - C&P as NRL -add a mask of choice - delete mask and ungroup layers- then crop opaque - open Bottom layer, an then Merge Visible
22.) Add all Copy Rights an Name.. save a PNG
Thanks for checking it out.
Angie

Sunday, October 4, 2015

Falling into Halloween PTU

 photo fallinintohalloween2betty_zpsopuwjvod.png

I wrote this Tutorial, any resemblance to others purely a coincidence. Please do not add this to any Website , Group or Forum, without my permission.
The Kit I am using today is by WhiteMyst Designs and is called "Falling into Halloween" you can buy this kit
Here    and   Here    
My Witch is one of my fav.'s of Elias Chatzoudis and you can buy his tubes Here
My Supplies Here
Drop Shadow = DS = 2, 2, 50, 5 blk
Animation shop = if making the animated tag.
Let's Begin
900 X 900
I should explain why I use such a large # for my canvas, simple so I have room to play around . Being 1 of 9 kids, it sure makes it easier for the larger size.. If you don't want to have it so big, don't worry, I always resize them, before I add the CR.'s
1.) E 52 - Copy and Paste = C&P as a New Raster Layer = NRL - place in center of canvas. on the right.
DS move this over a bit. Duplicate = Dup. - Mirror - have some space for your gate ( that's not there, lol ) Tag Reference = TR - when done close bottom layer and Merge Visible = MV - rename - Fence
2.) Grass - from my supplies -C&P as NRL - move this to the bottom of canvas -and right--now, dup.-flip, and move it down, until it merges - do this until you have enough grass,or until your happy, merge them =an move them under fence And merge together
3.) Sky - C&P as NRL -Place on top of grass- move this layer below grass and fence- leave it untended till later - rename sky
4.) House - Resize = R = 75% X2- unsharp mask = USM - C&P as NRL-place it on the right side above the fence, move layer below fence, TR - now go to - Adjust- Color Balance - Grey world Color balance - change Temperature # to 7000 - I also did this to the sky- to make it look stormy. DS
5.) Creepy Tree - R = 60% USM -C&P as NRL - place on top left - move layer below frame- DS & TR -( I dup. and pasted a few around - resizing some of them )
6.) E 55 - R = 75% & 80% - USM -C&P as NRL - place on bottom left side -- DS & TR
7.) E 51 - R = 50% & 80% - USM - C&P as NRL -place in front of Cart - DS & TR - dup. - R = 80% place it in front- if you wish you can add more- this is your tag.
8.) E 53 - R= 50% & 80% - USM-C&P as NRL -free rotate - 30 left - place on top of cart - move layer below cart- DS & TR
9.) E 56 - C&P as NRL - place on left side- move layer below the wheat layer - DS & TR
10.) E 45 -R = 50%- USM -C&P as NRL -place on right side - DS & TR - ( I duplicated -R = 50% more and place it in the Background.
11.) E 42 - R = 80% - sharpen - C&P as NRL - place on bottom pumpkin - DS & TR.
12.) E 47 -R = 80% - sharpen -C&P as NRL - place on top center - DS & TR - or wherever you wish.
13.) E 17 - R = 50% & 80% X2- USM- C&P as NRL- place on bottom left side- DS & TR
14.) E 19 - R = 50% USM - C&P as NRL -place on center bottom-DS & TR
15.)  Tube - R- if needed - C&P as NRL - place on right side- mirror - if you wish - DS & TR
16.) E 18 - R = 40% USM -C&P as NRL - place in center of both fences- DS & TR
17.) E 2 - R = 50% USM - C&P as NRL -place on top of house-- add a gradient glow -= 3, 25,40 with this color - EBFF64- DS & TR
18.) E 26 - R = 40% USM -C&P as NRL - place in front of witch = DS & TR-- if you wish you could mirror it.
19.) E 27 - R = 60% USM - C&P as NRL - move below tube layer - DS & TR
20.) E 28 - R = 30% USM- C&P as NRL -place on left side toward back - DS & TR
21.) E 32 - R = 40% USM - C&P as NRL - place on top of headstone - DS & TR - place layer below tube layer
22.) E 31 - E = 50% USM - C&P as NRL - place bottom center - DS & TR.
23.) E 40 - R = 50% USM - C&P as NRL - place on left- mirror - move layer below wheat - DS & TR.
24.) E 5 - R = 75% X 2 - USM - C&P as NRL - place on top left side- ( If you don't want to animate , then add DS)
25.) For Either tag- Go ahead and Resize all layers - 56% = 504 X 504 =  add all copy rights-if you don't want to animate- than Merge Visible all layers- add your name.. and save a PNG
Animate
1.) On ghost layer - rename Ghost- close off
2.) close off - the signpost all the way to bottom layers-- Merge Visible all other layers - rename- top
3.) Close off - top - open all other layers but Ghost and post. Merge visible - all - rename bottom-
4.) Duplicate the Ghost for as many letters as in your name- with all other ghost layers closed but for 1st one, with a nice font - I used ( Bloody  72 st.2 cd0000 (color) & DS) Add letters to each ghost-- After adding a letter and DS I would ,bring that letter below the one before, so they line up, you don't necessarily have to be straight be creative...
Once you are ready, make sure all ghost are closed but 1st letter, copy merged and go to Animation shop, and copy paste as new Animation - go back to PSP close that layer go to next letter - open it, copy merged and paste as after current frame, when you get all layers transferred, go back to PSP and open all letters, copy merged and paste this as the last frame = go to edit - select all - click on 1st frame - and then go to the last frame-  click on it, then go to frame properties I changed all to 50, except for the full name , I changed that to 75
When happy Save as GIF
Thank you for giving this a try.
Hugs
Angie


 photo fallinintohalloween2betty_zpskjfobh5p.gif

Tuesday, September 29, 2015

Woman Police PTU


 photo wpcari_zpsb2ka7nfa.png

I wrote this Tutorial, any resemblance to others is a coincidence. Please do NOT ad this to any Website, Group or Forum, without My permission.
The tube I am using is by Michael Landefeld and can be found Here
The scrapkit is called "Woman Police" and is by Black Widow Creationz and you can find it Here
My Supplies Here
Just scroll down and you'll find it...lol
Drop Shadow = DS - 2,2,50,5 black
2 tubes
Let's Begin
900 X 900
1.) El. 29 - Copy and Paste = C&P as New Raster Layer = NRL- place in center of canvas - With Magic Wand click on the inside of frame - Mod- expand = 10
2.) Paper 5 or one of choice-C&P as NRL- invert and delete - select none = SN - move below frame - DS
3.) Close - up - C&P as NRL-Resize = R= (if needed) move her below frame, delete any that is coming out of the bottom, Duplicate = Dup.-adjust- blur- Gaussian 6- Blend Mode - Hard light -opacity 70% - Merge Down-  DS. close off bottom layer and Merge Visible - rename - Frame
4.) On the next 2 tubes, C&P as NRL- Place  one in front of the frame - and for both - dup. - blur- Gaussian 6- blend mode - soft light - opacity= 100 , merge down and DS , Tag Reference = TR
5.) El.10 -R= 80% - unsharp mask = USM - C&P as NRL- place center bottom - DS & TR
6.) El. 11 - C&P as NRL- place in center - DS - move layer below both tube layers - TR
7.) El. 2 = C&P as NRL-place in center -DS & TR
8.) P 5 -C&P as NRL- place below the bottom layer - 
9.) El. 4 - R = 80% X2 - USM - C&P as NRL- place bottom left - move below tube layer - DS
10.) El. 8 -C&P as NRL-place top center- DS - move layer below tube layers
11.) El. 7 -  C&P as NRL- place center - move layer above bullet hole - DS
12.) El. 26 - C&P as NRL- place bottom - move layer above the bottom layer.
13.) El. 9 - R = 70% &80% -USM - C&P as NRL- place center top - between both tubes - DS
14.) El. 24 - R = 50%--USM - C&P as NRL- place on bottom right corner.
15.) El. 23 - R = 60% - USM - C&P as NRL- place on left side - DS & TR
16.) El. 21 -R = 50% - USM - C&P as NRL- place on top and move layer below tube layers
17.) Use the Inmate plaque - I made, C&P as NRL-, I added my nickname of sorts- it can be optional - Resize if needed, DS & TR
18.) El. 27 - C&P as NRL- place on top - DS & TR
19.) El.14 - R = 50% & 80% - USM - C&P as NRL- place on bottom right - DS & TR - move below tube - free rotate right 20% - dup. R = 80% move to left corner - free rotate left 20% X 2
20.) Make sure all layers are open, Merge Visible -  R= 56% sharpen if needed. = 504 X 504
Add ALL Copy rights, and your Name.. Save as PNG
Thanks for following along.
Hugs
Angie


 photo wpkandii_zpsbxcurnmf.png


Tuesday, September 8, 2015

Fantasy Heart PTU

 photo Fantasy heartkandii_zpscnrjppgx.png
I wrote this tutorial, any resemblance to others is purely coincidental. Please do not add this to any Website, Group or Forum, without my permission.
This Beautiful scrapkit is called " Fantasy Heart" by Kandii Popz and can be found Here
The tubes I am using is by Sandra Lusquin and can be found Here
My Supplies Here
2 Tubes
Let's begin
Drop Shadow = DS - 2,2,50,5 black


900 X 900
1.) Fence - Resize=R-90% - sharpen - Copy & Paste = C&P - as A New Raster = NRL - and place in the center of tag. - Drop Shadow = DS
2.) Grass - R = 70% - Sharpen - C&P as NRL -place in front of fence.- DS - duplicate = dup.- mirror-add- NRL -grab your freehand selection tool - go around tag as in EX.1 - in your material palette on either color, use this one "00e8a9"  now with your flood fill tool, add your color to the New layer - EX.2- Select none = SN - move layer to right above bottom layer. - Tag Reference = TR- ( if you want your bottom a different color you can always change it.)
3.) With Raster deform tool, on top grab the center node as in EX.3 - push down - EX.4 and EX.5 - once done - grab the center node and pull up slightly - this is the grass effect. LOL -TR
4.) Log - R = 70% - sharpen -  - C&P as NRL -  place on bottom left side- DS & TR
5.) Greenage - - C&P as NRL - place left center , move below frame DS & TR
6.)  Cloud 1- C&P as NRL - place  on sky-  move to upper right. NO DS!
7.) Cloud 2 - R = 70% sharpen - C&P as NRL - place on left side - NO DS - Duplicate = Dup. - R = 80% - sharpen - move back a little - DS gives it a stormy look--TR
8.) Chair - R = 80% sharpen - C&P as NRL - move to the right side -DS & TR
9.) Bird Cage - R = 80% sharpen - C&P as NRL -place behind stump - DS & TR 
10.) Add tube  - R if needed - C&P as NRL- I placed my 1st one - on the left side- Dup. - Blur - Gaussian 6- blend mode = Soft light - merge down = MD - DS & TR
11.) Bird - R = 50% UnSharp Mask = USM - C&P as NRL -place on left side of cage - Dup. move this layer beneath the cage layer - on top erase all the leaves -    Then DS on the bottom.
12.) 2nd Tube -C&P as NRL - Dup -Blur -Gaussian 6 -Blend Mode = soft light -MD - DS & TR
13.) Clock - R = 50% & 80% X 2- USM -C&P as NRL- Place on chair - move layer below 2nd tube layer - DS & TR
14.) Dove - R = 50% & 80% - USM- C&P as NRL - place on sky (wherever you wish) DS
15.) Basket- R = 60% - USM - C&P as NRL - place on bottom right - DS & TR
16.) Flower 1 - R = 60% USM - C&P as NRL - place over basket- mirror (Dup. and close this is if you make a mistake )  - go around the handles as in EX.6- when done delete - Select none - open the other flower and place this between the tubes - DS - TR
17.) Flower 3 - R = 60% & 80% -USM - C&P as NRL - place on fence right side - DS - move layer below chair- on the right side - TR
18.) Watering Can - R = 60% & 80% USM - C&P as NRL - place in front of the flowers, center bottom - DS & TR
19.) Rose1- R = 60% & 80% X2 USM - C&P as NRL - place on bottom left side - DS & TR - Dup. - R = 80% - mirror - do this a few more times, I did mine 4 more times.
20.) Rose 2 - R = 60% X 2 & 80% USM - C&P as NRL - place this one on left side bottom between both faries.  place this layer below flower 2 - DS & TR - you can always Dup. and Resize them if you do.
21.) Leaves 2 - R = 60% USM - C&P as NRL - Place above grass layer - DS - Dup. Mirror - TR
22.) Butterfly 1 = R = 50% & 80% USM - C&P as NRL - place far right middle - Free Rotate - left 20 - DS & TR
23.) Butterfly 2 - R = 50% & 80% - USM - C&P as NRL - place on center of tag - DS & TR
24.) Sparkles 2 - C&P as NRL - mirror - place layer below tube 2 layer - NO -- DS - TR
25.) Now Merge flattened- In the material pallette - grab 2 colors from tube - Select all - float- defloat -                                             - modify - contract-invert - add NRL-flood fill with dark color - keep selected- inner bevel - 2-8-0-20-0-0-315- 50- 30 - Select none - merge again - and resize 56% = 504 X 504 
Add all Copy Rights and Name -save as PNG..
Thank you for keeping up with me.
Hugs
       Angie     


 photo Fantasy heartkandiipopz_zps7eg8dq4s.png


One for Cari
 photo Fantasy heartcarik_zpsejh61tcw.png


Friday, August 7, 2015

Seashore (A) PTU

 photo seashorea.avitaC_zpsfdmiqj54.png
  photo seashoreatcari_zpsecomh2oj.png
I wrote this Tutorial , any resemblance to others is purely a coincidence. Please DO NOT a this to any Website, Forum or Group, without my permission.
This awesome Summer kit is called " Seashore"  by Black Widows Creationz Here
The tube is by Ismael Rac Here
My Supplies/examples Here
Drop Shadow = DS = 2,2,50,5 black
Filters = Mura Meister- Copies -
650 X 250
Let's Begin
1.) EL 8 -Copy and Paste = C&P as New Raster Layer= NRL place in center - go to MMCopies - EX.1
2.) Tube - C&P as NRL - (Crop - opaque - 650 X 250) - duplicate - close dup.- On original, change opacity to 45%-mirror-dup.- blur- Gaussian 6- Blend mode =BM= Hard light - opacity = 100 - merge down = MD - rename tube 1.on second tube, open it up
3.) EL.2 - Resize = R = 50% - sharpen = unsharp mask -C&P as NRL -Place behind 2nd tube - DS -tag reference = TR.
4.) EL.20 - R= 50% -unsharp mask=USM-C&P as NRL -Place behind grass-dup.-move - up a bit, then MD--DS & TR
5.) EL.27 - R= 50% & 80%X2 - USM-C&P as NRL - place in center - now move it behind water - free rotate - Left 30 - make it look like a sinking ship - DS & TR
6.) EL.28 - R= 50% & 80%-USM-C&P as NRL -place on left side - free rotate- right 30 - DS & TR.
7.) EL. 30 - R= 50% X 2 -USM-C&P as NRL- Place on center bottom-free rotate - left 30- erase some-so it looks like its in the sand- DS & TR
8.)  EL.3 - R= 50% & 80X 3 - USM-C&P as NRL - place on left bottom - DS & TR
9.) EL. 31 - R= 50% X 2 & 80%X4 -USM-C&P as NRL-place on center left - DS & TR - Dup. R = 80% - place this one where you want.
10.) EL. 32 - R= 25% & 80% X2 - USM-C&P as NRL - place in center - move layer below boat layer - Dup. - R= 80% - place this one wherever you wish - I did this a total of 3 X's - DS
11.) EL. 34 -  C&P as NRL - Place on left side-  - DS & TR
12.) EL. 36 - R = 60% X2 & 80% X2 -USM-C&P as NRL - free rotate - right 30 - DS & TR
13.) EL. 15 - R = 60% & 80% X3 - USM-C&P as NRL - place on water and move below tube layer on the right side - DS & TR
14.) Merge all layers - EL. 19 -C&P as NRL - place on top right- dup.- flip - you can place them where ever you wish.
15.) EL. 33- C&P as NRL - Merge visible all layers
Add ALL Copy Rights and name. Save as PNG
as for the Avatar - find a nice side ( remember if you add your tube to the avatar you will have to add your artist but also your license #) the avatar should be 150 X 150
thanks for following me.
Hugs
Angie


 photo seashorea.avitak_zpskkkqb8rj.png


 photo seashoreakandii_zps5eaduhnb.png


Saturday, July 11, 2015

Faery Life PTU


I wrote this Tutorial, any resemblance to others is purely coincidence.
Please do not add this to any website , Groups or Forum.
This cute Faery kit is called " Faery Life" and is by Kandii Popz dezignz and can be found Here
The tubes I used is by Ismael Rac and can be found Here 
Drop Shadow = DS= 2,2,50,5 black
Let's Begin
900 X 900
1.) Mushroom - Copy and Paste = C&P as New raster layer =Nrl - place in center of canvas - DS
2.) Flower Lights -C&P as Nrl-- place on top - leave at least 2 blocks from each side - you might have to Duplicate = Dup.- when happy - Merge Down = MD - crop opaque - 900 X 900 - Tag reference = Tr.
3.) Doodle - C&P as Nrl-- place beneath mushroom - and move to left side - DS & Tr.
4.) Dripping Hearts - C&P as Nrl--  place on left side of tag - move beneath the lights - top right side - DS & Tr.
5.) Frame 3 - C&P as Nrl--  Place on bottom center- with Magic wand - click on inside 1st frame - selection - modify - expand X 10
6.) Paper 6 - C&P as Nrl-- place over 1st frame - invert on frame - delete on paper- move layer below frame- Select none = SN - continue to do this for all 3 frames - you can use whatever paper you wish - DS on frame and paper - rename frame- so it will be easy to get too.
7.) Lady Bug - C&P as Nrl-- place on 1st frame - move layer on paper below the frame -  erace any overhanging -DS and Merge Down = MD with paper-- Tr.
8.) Continue to do the same with the other 2 frames, add whatever elements you wish -  DS on frame-  I used the Lolly1 and snail as well as the cupcake -
9.) Amaranth - C&P as Nrl-- place on opposite side of the heart - DS & Tr, If needed mirror the flower
10.) Tube - Resize = R - if needed - C&P as Nrl. - place it on tag where you wish - Dup. - Blur - Gaussian - 6 - Blend Mode - Soft light - MD. -and DS - Tr.
11.) Cherry Cup - C&P as Nrl--  Place  on upper left or where you wish - DS & Tr.
12.) Faery -  C&P as Nrl-- place on bottom left -  DS & Tr. (mirror if you choose_
13.) Flower Faery -C&P as Nrl--  place on right side of tag - DS & Tr.
14.) Glitter - C&P as Nrl--  place above bottom layer - NO DS -- Tr.
15.) Sparkle 1 - C&P as Nrl--  place on top layer -- NO DS --Tr.
16.) Bird - R = 80% - unsharp mask - C&P as Nrl-- place top center
17.) Close off bottom layer- Merge visible all layers - R = 56% - sharpen
18.) Paper 10 - or one of choice -C&P as Nrl--  add a mask - then delete mask and ungroup layer- crop opaque- then open bottom layer - now Merge visible all layers
19.) Add ALL Copy rights information and Name - save as PNG.
Thanks for taking a look
hugs
Angie


Saturday, June 13, 2015

Minty Frost PTU

 photo mintyfrost1cari_zpss1ioht7k.png

I wrote this Tutorial, any resemblance to others is purely a coincidence. Please do not add this to any Forum, Group or Website.
This pretty scrapkit is called :" Minty Frost " and is by Blackwidow Creationz and can be found Here
The Tube I am using is by Barbara Jensen and can be found Here
You'll need
2 tubes, A big one and smaller one.
Drop Shadow = DS - 2,2,50,5,black
Let's Begin
900 X 900
1.) `EL.20 - Copy and Paste = C&P as New Raster Layer = NRL.-place in center of tag.
2.) With Magic Wand - add shift- (Ex.1) click in all 3 sides- you might have to do it a few times.
3.) P. 2 or 1 of your choice..- C&P as NRL -place over frame - invert and delete- select none = SN - move layer below frame - DS - both , I used 2 papers...for the whole frame- Tag reference = TR..
4.) Close up tube - C&P as NRL - place her in center frame - duplicate= dup. - Gaussian blur - 6 - Blend Mode= BM = multiply- opacity = OP = 75% -- merge down = MD - DS -
5.) EL. 14 - C&P as NRL - place on bottom right of frame - DS -  dup.- Resize = R - 75% - unsharp mask = USM -place on left of 1st flower - dup. R.- 80% sharpen = Sh- place on right of main-flower- Tag Reference = TR
6.) EL. 11 - C&P as NRL - place on bottom left - DS & TR
7.) 2nd  - Tube - C&P as NRL  place it on left center-dup. - blur-Gaussian 6 - BM= soft light - OP= 100 - MD - DS  & TR - move layer below the kitty layer.
8.) EL. 2 - R = 65% - USM - C&P as NRL - place on top right - DS & TR
9.) El. 13 - C&P as NRL- place layer above frame layer - DS & TR
10.) EL. 25 - C&P as NRL - place this layer below 2nd tube layer - DS & TR
11.) EL. 12  - R= 60% -USM - C&P as NRL - place on bottom right corner - DS & TR
12.) EL. 17 - R = 45 % USM - C&P as NRL- place on left side center -half way down - on tree- move layer below 2nd tube layer -DS & TR
13.) EL. 28 - R= 75% -USM - C&P as NRL - place next to kitty - DS - dup.- move this one to the right a little - so it sees that your are looking at 2 of them - TR
14.) EL. 29 - R= 60% -USM - C&P as NRL - place on bottom of frame - DS & TR
15.) El.31 - C&P as NRL - place on right center - DS & TR - move layer below flowers on tag .
16.) EL. 32 - R = 60% USM. - C&P as NRL - place on bottom right - DS - dup. R=80% - place it next to other one-  TR
17.) EL 35 - R - 50% & 80% -USM - C&P as NRL- place on bottom left - DS --and move this one up a smidge - so it looks like 2 shoes.- TR
18.) EL. 23 - C&P as NRL - place wherever you want your snowflakes - DO NOT DS - TR
19.) Close bottom layer - Merge Visible = MV - R= 56% - sharpen ( if needed)
20.) Add paper of your choice to bottom, then add a mask - delete mask - ungroup layers - (crop if needed [opaque]) MV
Add all Copy Right Info an your Name.
Save as PNG.
Thank you for keeping up with me.
Hugs
Angie


 photo mintyfrost2cari_zpsdyrntm4t.png