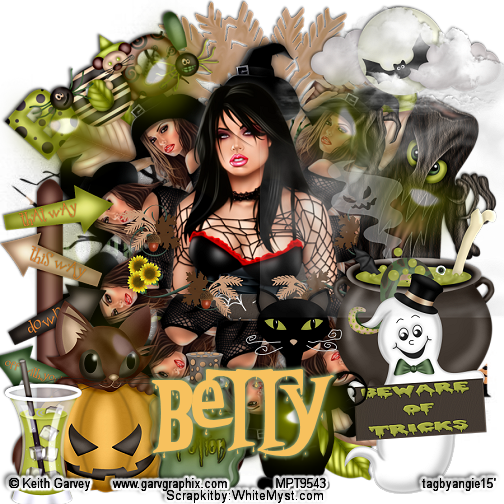
I wrote this Tutorial, any Resemblance to others is purely coincidental. Please DO NOT add this to any Website, Group or Forum without my permission.
This cute Halloween kit is called " Falling into Halloween " by WhiteMyst Designs you can find it Here or Here
The tube is by Keith Garvey and you can get his tubes Here
Filter used = MuRa's Meister Copies
Drop Shadow - 2,2,50,5 black
2 Tubes - 1 close-up , and 1 regular
Let's Begin
900 X900
1.) Close-up tube - Resize = R = 50% Copy and Paste = C&P as New Raster Layer = NRL , place in center - Duplicate = dup. - Blur - Gaussian - 6 -Blend Mode - multiply - Opacity - 80% - Merge Down = MD.
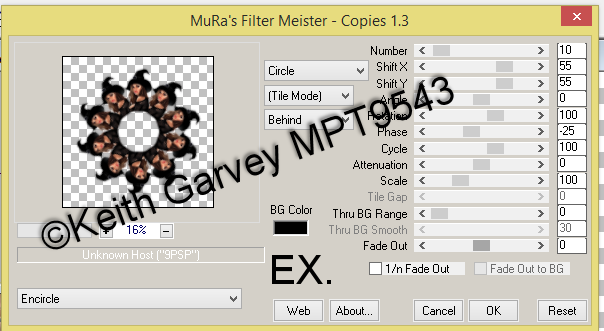
2.) Go to MuRa's Meister- Copies - This setting -
Encircle - Circle- Tile Mode - Behind - 10 / 55 / 55 / 0 / 100 / -25 / 100 / 0 / 100 / 0- / 0 / 30- / 0 . EX.

.3.) With Magic Wand - click inside frame - sel.-modify-expand - 12
4.) P 3 - or one of choice - C&P as NRL - place over frame - invert -delete - Select None = SN
move paper below frame, and DS- both. - rename Frame
5.) 2nd Tube - R= 80% & 90% - sharpen - - C&P as NRL - place her in center of frame - dup. - blur - Gaussian 6 - Blend mode - soft light - MD - DS & Tag Reference = TR - move her up a bit
6.) F 4 - - C&P as NRL - place below 2nd tube - DS & TR
7.) E 16 - R - 80% X2- unsharp mask - USM. -- C&P as NRL - place toward bottom of frame- DS- now move layer below frame - Dup. - mirror - dup.- flip- dup. - mirror- place these leaves around frame - TR - I merged mine to save on space
8.) E 12 - R = 75% sharpen - - C&P as NRL - place on bottom left - DS & TR
9.) E 60 -- C&P as NRL - place on bottom right - DS & TR
10.) WA 1 - R = 60% - USM - - C&P as NRL - place on top left - free rotate - left 30 - DS & TR
11.) E 56 = - C&P as NRL - place on left side - DS & TR - move layer below the pumpkin kitty.
12.) E 57 - R = 60% - USM - - C&P as NRL - place next to pumpkitty-- DS & TR
13.) E 8 - R = 80 X 2 - USM - - C&P as NRL - place on right side next to snowman- DS
14,) E 58 -R = 60% USM - - C&P as NRL -place on left side DS & TR
15.) E 53 - - C&P as NRL - place center top- move layer below frame--DS & TR
16.) E 47 - R = 80% USM -- C&P as NRL - place top right - mirror - DS & TR
17.) E 37 - - C&P as NRL -right center - move layer right below snowman - DS & TR
18.) E 2 - R= 80%-sharpen- C&P as NRL -place over bat-DS & TR
19.) E 4 - R=80% -sharpen-- C&P as NRL -place over cauldron - DS & TR
20.) E 43 - - C&P as NRL -place behind cauldron - DS & TR
21.) Close bottom layer - merge visible all layers -R = 56% sharpen -Paper 1 - - C&P as NRL -add a mask of choice - delete mask and ungroup layers- then crop opaque - open Bottom layer, an then Merge Visible
22.) Add all Copy Rights an Name.. save a PNG
Thanks for checking it out.
Angie
No comments:
Post a Comment