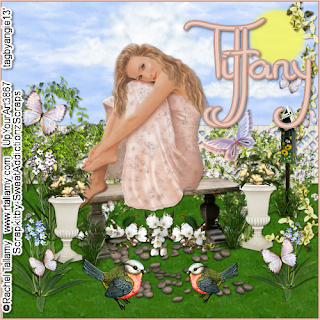
I wrote this tutorial,and resemblance to others,is purely coincidence. DO NOT place this anywhere without my permission.
The Lovely kit I'm using is called " Morning Glory" By Sweet Addictionz Scraps and can be found Here
My Tube of choice is by Rachel Tallamy and she can be found Here
My Supplies Here
Drop Shadow =DS = 2,2,50,black
Let's begin
900 X 900
1.) EL 1--Copy and Paste = C&P--as New Raster layer= Nrl
place in center of canvas--rename --bench--DS
2.)Grass-- C&P as Nrl --place below bench layer--move it down a little--duplicate =dup--and place on right--dup. and mirror--merge down= MD--all 3 layers--dup. this layer and move the other down,and make sure the layer is below the 1st. layer..dup. move this one above the top layer---close bench layer and Merge Visible = MV all the grass layers, then crop opaque--TR
3.) EL 3--gate- - C&P as Nrl -place in the back--on top of grass, move it to the edge--TR--DS--dup. and mirror--MD--Crop--opaque
4.) Tube--- C&P as Nrl - R--if needed-- place her on the bench--DS
5.) EL 4--- C&P as Nrl -place on grass--near the others--DS & TR
6.) EL 6-C&P as Nrl -place on the stones---TR-dup--and move this behind the bench layer--on top 1--with freehand selection tool--point to point--add shift--feather--0 --smoothing--0--anti-alias-checked-go around the end of the element as seen in EX 1--once done--edit and cut--Select none--DS--bottom flower
7.) EL 31--R = 80%--sharpen- C&P as Nrl--mirror--place on right side--move layer below bench layer--DS & TR
8.) EL 5--R = 70% X2--unsharp mask-C&P as Nrl-place on right side--DS--dup. & mirror--TR
9.) EL 32--R = 65--unsharp mask-- C&P as Nrl -Place on left side --DS--TR-- move layer below -bench layer--on top of grass
10.) Sky--C&P as Nrl-- place on bottom layer--TR--DON'T DS
11.) EL 30--C&P as Nrl -- place on upper right side --TR--move layer below the side plant--opacity= 85%
12.) Clouds-C&P as Nrl- Place below tube--dup- R = 80% X 3=sharpen--and move below the sun layer.
13.) EL 11.- R = 80% X 3--unsharp mask- C&P as Nrl--place on the right side of canvas --ans place the layer below planter-- TR & DS
14.) EL 12-R = 80% -sharpen--C&P as Nrl--place on right side--move layer below bench--DS--TR--mirror --place layer below tree layer
15.) EL 13--R = 60% -- unsharp mask--C&P as Nrl--place on left side bottom--DS & TR
16.) EL 15--R = 70% --unsharp mask--C&P as Nrl--place on left side of canvas move layer below bench--DS--TR--dup.--mirror--R = 80%--place lower--TR
17.) El 19.--R = 60% & 80%-- sharpen- C&P as Nrl- place on bottom left in front--DS--TR--dup.- R = 80% mirror and place lower... TR
18.) EL 33-R = 60% & 80% X 2--unsharp mask-- C&P as Nrl--place on left side near tree--DS--Dup. R= 80% Place where you want, I added a few more --Tr-- free rotate right 25..
19.) Open bkgrnd and Merge Visible all layers--we're going to add a border--Get 2 colors from tube--A light one and a Dark one..go to Image--add borders--3 dark--and 2 light--once done
20.) R=55 %-- sharpen--add All Copy right and name..then save as PNG.
Thank you for doing my Tutorial
Hugs
Angie

