Sunday, February 8, 2015

Shades of Pink PTU

I wrote this Tutorial, any resemblance to others is purely a coincidence. Please DO NOT add this to any Website, Forum Or Group, without my permission.
This Beautiful kit is by WhiteMyst Designs and can be found Here
And the art is by Bez Boardman and can be found Here
My Supplies- Here
Just scroll down till you find it.
Drop Shadow = DS= 2,2,50,5 blk
Lets Begin
900 X 900
1.)  Paper 3-Copy and Paste = C&P = as New Raster Layer = NRL
2.) Tube of choice - C&P as NRL - place in center - Duplicate = Dup. - Blur - Gaussian 6 - Blend Mode = BM = Hard Light - Opacity = 100% - Merge Down = MD  - DS
3.) Bird and bird house - place on right side - move layer below tube - DS and Tag reference = TR
4.) Confetti and Starts  -  - C&P as NRL - place on upper left - DS
5.) Flower -- C&P as NRL - move to above paper & stars layer - DS- Dup. and Mirror - TR
6.) Balloon Dog - Resize = R = 50% & 80% X2-sharpen-unsharp mask = Usm. - C&P as NRL -place on lower right middle (DS) -free rotate- right 25 - Dup. - move to upper left side- Free rotate - Left 25
7.) Can - R = 50% & 80% - Usm.-- C&P as NRL -place on bottom left - DS
8.) Cupcake - R = 50% & 80% - Usm.- C&P as NRL - place on left bottom - DS
9.) Gift box - R = 50% Usm. - - C&P as NRL -place on right bottom - DS
10.) Halter top -R = 50% Usm. - C&P as NRL -move next to box, DS - move layer below tube. - TR
11.) Panties temp. - R = 50% X2 - Usm. - place near halter top - DS -TR
12.) Balloons - - C&P as NRL -place under tube layer - move down a little- DS & TR
13.) Hearts 2 - - C&P as NRL - place on bottom - right corner- move layer right above paper layer- DS - Dup. - mirror - & Flip - TR- move up a bit - MD
14.) Nail Polish - R = 50% - Usm. -- C&P as NRL - place in front of pressie
15.) Hearts -  - C&P as NRL - place on top left- DS & TR
16.) Lava Lamp - R = 60% - Usm. - - C&P as NRL -place on left center- DS & TR--move layer above the hearts2 layer
17.) Forget me nots - 50% Usm. - C&P as NRL - place on right side DS & TR -move layer below the tube layer.
18.) Candle - R= 50% & 80% - Usm. - C&P as NRL - place next to soda can - DS & TR
19.) Keyboard - R= 50% Usm. - - C&P as NRL - place on upper right- move layer below branch - DS & TR -  layer properties - BM= Multiply - Opacity = 100%
20.) Dragonfly - R =50% X2 - Usm. -- C&P as NRL -place on right side- beneath branch - DS & TR - free rotate - left 25
21.) Butterfly - R = 50% X2- Usm. -- C&P as NRL - place above bottom dog- free rotate left 25 - Dup. - R = 80% - move to bottom left near lava lamp..TR & DS
22.) Glitterfly - R = 50% & 75% - Usm. - C&P as NRL - move to center - place on bird house - Dup. - R-80% -move down - TR
23.) With bottom still closed - Merge visible all layers.
24.) Sparkles - C&P as NRL - Opacity= 75% - open bottom layer - merge all flattened-
25.)Resize all layers 56% - sharpen - now were going to add a border.-- get 1 or more colors from canvas.. I used : 725447- Add a 10 on borders.- now go to effects and add a inner bevel. As in EX 3
Add all Copy Rights and your Name;
Save as PNG.
Thank you for sticking it out..
hugs
Angie


Thursday, January 29, 2015

School Candy PTU

I Wrote this Tutorial, any resemblance to others is purely coincidental. Please do NOT add this to any Website, Forum or Group without my Permission. Thank You.... The Scrap-kit I am using is by Black Widow Creationz and can be found Here
The Tube is by : Spazz and can be found Here
Drop Shadow = 2,2,50,5 black
My Supplies - Here
Let's Begin
900 X 900
1.)EL.19-Copy and Paste = C&P as New Raster Layer = NRL - Place in center of canvas
2.)With Magic Wand click on the inside of frame - Selection - Modify - Expand 10
3.)Paper10 - C&P as NRL- Invert on frame - delete on paper -Select None + Sn -- DS
4.)EL.14-Resize = R= 80% - Sharpen -Unsharp Mask = USM - C&P as NRL - place on paper - upper right side.
5.)EL.15-R =50%-USM -C&P as NRL- place on paper upper left- Tag Reference =TR- Free rotate - left 25
6.)EL.20-R=50% USM-C&P as NRL-place on the right side of frame. DS & TR, go around frame,(EX1) cut out to make it look like it's hanging down (EX2)- cut-SN
7.) EL.3-R = 50%- USM -C&P as NRL- place on center-type in something if you wish- now resize- then free rotate - left-25- move below previous layer - DS & TR
8.)EL.28-R=50% & 80%X2 - USM -C&P as NRL - place on paper-DS&TR -  move below frame.
9.)EL.33-R = 50% & 80% X2- USM-C&P as NRL- place on bottom of frame- move underneath - DS
10.)EL.49-R=50% & 80% - USM -C&P as NRL - place on bottom of frame- duplicate= DUP. & lay this on down- free rotate -45 right - move this down below other - Crayola - close off background & Merge Visible = MV. all layers -TR- rename frame - move up a little.
11.)Tube-C&P as NRL- Place on left of tag ( resize if needed )- DUP.- blur-Gaussian 6 - Blend Mode = soft light - opacity = 100 Merge Down= MD.- DS and rename tube.
12.)EL.48-R=75% - USM-C&P as NRL- place on center bottom, DS&TR- move below frame.
13.)EL.12-C&P as NRL- place on right side -DS and move below frame
14.)EL.18-C&P as NRL-DS- move to top right- DUP.- mirror - flip - move both layers above bottom layer - MD.- & DS
15.)EL.10-C&P as NRL - place on upper left side-DS&TR-DUP.-Mirror and flip- place both layers over bottom layer
16.)EL.2-R=50%-USM-C&P as NRL- place on top right. DS
17.)EL.13-C&P as NRL - move below shoes on the right - DS&TR
18.)EL.24-R= 80% sharpen- C&P as NRL - place on top right side- DS&TR
19.)EL.26-R=60%-USM-C&P as NRL-place on bottom left side.
20.)EL.47-R=50% & 80%X2-USM-C&P as NRL-place on bottom, DUP. a few and lay them around the shake. DS&TR
21.)EL.46-R=50%-USM-C&P as NRL-place in front-around shake-you can also DUP.& R a few-move them around.
22.)EL.6-R=50%&80%X3-USM-C&P as NRL-place on bottom center-DS&TR
23.)EL.42-R=80%X2-USM-C&P as NRL-place center bottom. DS&TR
24.)EL.27-R=80%X3-USM-C&P as NRL-place on left side of 1st sucker-DS
25.)EL.41-R=80%X3-USM-C&P as NRL-place on the other side of sucker- DS&TR-free rotate - right 25
26.)EL.43-R=80%X2-USM-C&P as NRL-place on the other side-free rotate-right-35.once happy- MD-DS&TR
27.)EL.22-R=50%-USM-C&P as NRL-place on suckers-DS&MD
28.)EL.30-R=50%-USM-place on pad
29.)EL.38-R=50%-USM-C&P as NRL-place on bottom left-DS&TR-DUP. and move this below tube layer- with freehand selection tool-point to point-add shift- feather=1-smoothing=0- go around the backpack and erase the pack so the foot is in front. DS&TR
30.)EL.4-C&P as NRL-place on top left-move layer below tube layer-DS&TR
31.)EL.36-R=50%-USM-C&P as NRL-place in front of backpack-DS&TR
32.)EL.37-R=50%X2-USM-C&P as NRL-place on bottom left side-DS&TR
33.)EL.9-C&P as NRL-place on right side below the tube (DO NOT DS)
34.)With bottom still closed - MV all layers- R=56% = 504X504-sharpen
35.)Paper 7 (or one of your choice) place it below the merged layer- add a mask of choice- delete mask - ungroup layers- open the bottom layer and MV all layers.
Add all Copy Right info and name.
Save as PNG.
I hope you enjoyed my tutorial, as much as I liked making this tag.
Thank you
Hugs
Angie


Tuesday, January 6, 2015

June PTU

I wrote this Tutorial, any resemblance to others is purely a coincidence. Please do NOT add this to any Website, Forum or Group, without my permission. Thank you...  This very pretty scrapkit is by WhiteMyst Designs Here
The Tube is by Barbara Jensen and you can Buy them Here
My Supplies - Here
Drop Shadow = DS = 2,2,50,5 black
900 x 900
1.) Distorted Star Deco. -- Copy and Paste = C&P -- As New Raster Layer = NRL - place in center of Canvas
2.) With Freehand selection tool - point to point -add shift - feather = 0 - Smoothing = 0 - anti - alias checked -  click inside the frame - selections - modify - Expand X6
3.) C&P as NRL- background either with mine or one of yours, Invert and delete - when done move this layer below your frame, DS both (I didn't add anymore things to my picture and I - merged down to one layer- renaming it as frame)
4.) Tube - C&P as NRL - place tube next to frame, duplicate = dup. - Blur - Gaussian blur -6-- blend mode = BM - soft light - opacity = 100  -  Merge Down = MD - DS
5.) Flowers Doodle #5 -C&P as NRL - Place on right side - move layer below frame layer--DS---Tag reference = TR
6.) Flowers Doodle - C&P as NRL - place on left side upper corner - mirror and move below tube layer - DS & TR
7.) Gift Box- Resize = R - 50% - Unsharp Mask = USM -C&P as NRL - place on bottom right - DS & TR
8.) Glitter Sprinkle - C&P as NRL -mirror - move to top right - dup. - mirror- flip - MD - place this layer on bottom--DS - TR
9.) Heart Chain - R = 60% USM - C&P as NRL - Place on  doodle - DS & TR
10.) Keyboard - C&P as NRL - place on bottom right--DS - move layer below the gift box - TR
11.) Rose Cluster - R = 60% USM - C&P as NRL - Place on left front -- DS & TR
12.) Pearls -C&P as NRL - place on top left--move layer below tube layer - DS & TR
13.) Lace Fan -R = 60% USM - Place on bottom  right - DS & TR - crop - opaque - if needed
14.) Kisses - R = 60% X2 - USM -Place on bottom right - DS & TR - dup. - R = 80% place next to 1st one
15.) Milk Shake - R = 50% - USM - C&P as NRL - move to left side of fan--DS & TR
16.) Dog Balloon - R = 50% & 80% - USM - C&P as NRL - place it on center bottom- DS - dup. R = 80% - place it on top right - free rotate -45 left
17.) Decoration -  C&P as NRL -- place it on top center -place it on top of frame- DS - TR
18.) Cuppy Pop - C&P as NRL  - place on center left side-- DS & TR - move layer below flowers on left bottom
19.) Cherries -R = 50% USM -  C&P as NRL  - Place on left upper side - DS & TR - Dup. - R = 80% - place on right side - TR - dup. again - mirror - TR
20.) Glitter Butterfly -- R = 50% & 80% X3 -USM -  C&P as NRL -place on right side --DS & TR--dup. - R = 80% - mirror & place lower right bottom.
21.)  Sparkles --  C&P as NRL - opacity 60%
22 .) Close bottom layer - Merge visible all layers - R= 56% - sharpen-
23.) Paper of choice - C&P as NRL- move layer below merged..
24.) add a mask - delete mask- ungroup layer-- When happy open background and then Merge Visible
25.) ADD ALL Copy Right info, Name and save as PNG
Thank you for keeping up with me..
hugs
Angie


Tuesday, December 30, 2014

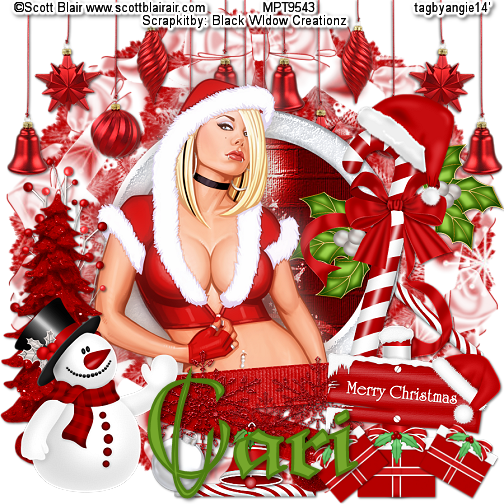
Miss Santa PTU


I wrote this tutorial, any resemblance to others is purely a coincidence. Please do not add this to any Website, Forum or Group without my permission. This Awesome tube is by Scott Blair and can be found Here
The awesome Christmas scrap-kit is by Cari at Black Widow Creations and can be found Here
Drop Shadow = DS - = 2,2,50,5 black
Resize = R
Let's Begin
900 X 900
1.) EL 38 - Copy and Paste = C&P - as New Raster Layer = NRL -place in center of canvas-
with magic wand click on the inside - selections- modify - expand 10
2.) P7-C&P as NRL-(or paper of your choice) invert on frame and delete on paper-- move paper below frame and DS both
3.) Tube - -C&P as NRL- place in front of frame -duplicate = dup. - on dup. - adjust - blur - Gaussian -6 -- Blend Mode = BM -soft light -- opacity = 100 = merge down-= MD
4.) EL 27 - C&P as NRL - place on bottom left - DS - Tag Reference = TR
5.) EL 29 - R = 80% Sharpen -- C&P as NRL - place on bottom right - DS -- TR
6.) EL 36 - C&P as NRL -  mirror -place on right center - move layer below tube layer--DS
7.) EL 4 -C&P as NRL - place on left bottom, move layer below snowman layer - DS - move up a little --TR
8.) EL 7-- C&P as NRL - place on top - move layer to right above bottom layer -- DS &TR -= duplicate = dup. - mirror  and MD
9.) EL 9 - R - 50 - adjust - sharpen - unsharp =USM -- C&P as NRL - place on bottom center -DS -move layer below the snowman layer -TR-dup. -R=80% - move down a little - dup. - R = 80% - move up a little --TR.
10.) EL 8 - R = 50% USM -- C&P as NRL - Place on bottom center--DS - free rotate left  28 - TR
11.) EL 25 - R = 50% & 80% - USM -C&P as NRL - place on bottom center - DS - free rotate - right 25% - TR
12.) EL 42 -R = 50% USM -- C&P as NRL -  place between both bulbs-DS & TR
13.) EL 41 - R=50% & 80% - USM-- C&P as NRL - Place on bottom center --move layer below the bell and bulb layers -- DS & TR - dup- free rotate 40% right- move layer below the candy cane and bow layer on the right center --TR
14.) EL 39 - R = 50% - USM-- C&P as NRL - place on bottom right-DS- TR-- dup. - R = 80% - free rotate left 40%- TR- dup. free rotate right 30% - TR
15.) EL 20 -- C&P as NRL - move layer below - tree on left -- DS & TR
16.) EL 30 - R = 50% USM-- C&P as NRL - place on top of candy cane--free rotate- right 45% TR
17.) EL 11- C&P as NRL - place right above the tube layer --DS & TR 
18.) close off the bottom layer -- now Resize all layers - 56 % --sharpen ( 504 X 504 )
19.) Paper 6 - or one of  your choice -- C&P as NRL - place right above the bottom layer -- add a mask ( one of your choice) delete mask and ungroup layers--  crop opaque -Open bottom layer -- M.V. all layers.
20.) Add all copy right info- name and save as PNG.
Thank you for looking.
Hugs
Angie


Tuesday, November 25, 2014

Thursday, November 20, 2014

Halloween Kitty PTU

I wrote this Tutorial, any resemblance to others is purely a coincidence. Please DO NOT add this to any Website, Forum or Group Without My permission.
The Halloween Kit is called "Halloween Kitty" By WhiteMyst Designs and can be found Here
The tubes I am using is by Brigid  Ashwood found Here
Filter = EC5 impact -- glass
My Supplies =  Here 
Filters - EC5 Impact 
Drop Shadow = DS = 2,2,50,5 black
Tubes - 2 tubes of choice
Let's get started
1.) Iron Fence -Copy and Paste = C&P --- as new raster layer = NRL - place in center of tag. - DS -  you might have to duplicate = Dup. and mirror, do this until your fence goes directly across your canvas.
2.) Creepy Tree--Some of these tubes are by "Belles Graphics " Please do not share them unless you have Becky's permission.-(to do so, would be not following her tou's )
 3.) Bat and Moon- C&P as NRL- place on upper left corner-- EC4 Gradient Glow--10 Yellow - DS - Tag Reference = TR
4.) Tombstone 2  = Resize = R. = 50% - Sharpen = Unsharp Mask= USM - C&P as NRL- place in center - DS & TR
5.) Tombstone - R = 50% X2 - USM - C&P as NRL- place on right side - move layer below fence layer - DS & TR
6.) Physco house - R= 54% & 80% X2 - USM - C&P as NRL- mirror and place on right side top. Move layer right above bottom layer - close off bottom layer.
7.) Grass - C&P as NRL- place on bottom - Dup. mirror and Merge Down = MD. move layer right below house--Dup. and Flip - bring down - MD - TR - continue making enough grass as you need..
8.) Click on bottom layer- add a NRL - flood fill -with 000000 (black)  rename sky
9.) Tube 1 = C&P as NRL- place on right side .-- Dup. Blur- Gaussian 6 --  Blend Mode = Hard Light - Opacity = 90% - MD & DS
10.) Witch Table - R = 50% - USM - C&P as NRL-place on grass - move layer below witch TR - Don't DS for now.
11.) With Ellipse tool - draw a circle - nice size one - Example in Supplies - when don Convert to raster layer-- with magic wand click on inside of circle
12.) Selection - modify - expand 6 - C&P as NRL- paper 1 ( or of your choice) invert on circle - delete on paper- Select none-
13.) If you want to animate- continue to do these steps. If not skip line #14
14.)  2nd Tube - C&P as NRL-  place under circle - and erase any sticking out of circle, try to center the picture where you can see almost all of the tube - DS & TR
15.) Still working on the Crystal Ball - (merge the 2 Down) with Ellipse tool - Material  (create on vector) line style - straight- width - 5 - anti - alias- checked. draw a decent circle around image - then go to- effects -EC5 Impact - glass - settings - Clear with reflection -now delete your elipse layer. Dup. Crystal Ball and then close- on duplicate you want to R = 15% USM - make it fit on the crystal ball- once done --Merge Down - MD
16.) Black cat - R = 50% USM.. - C&P as NRL - place on bottom left - DS - Dup. R = 80% - mirror - place on center fence - move layer below tree layer-- TR
17.)  Candy Bucket - R = 50% & 80%X2--USM -- C&P as NRL - Place it on center bottom.
18.) Cat on Pumpkin - R = 50% X2 - USM -  - C&P as NRL -Place it on right side bottom center--DS--TR- Dup. move this one left top side center - move layer below fence layer.
19.) Cauldron R= 50% USM - - C&P as NRL -move to left side - TR & DS
20.) Ghost - R = 50% USM - - C&P as NRL -place on right side- DS & TR - Dup. R = 50% - mirror - and move lower - TR
21.) Halloween lights - R = 50% USM - C&P as NRL - place on fence - from left to right - Dup.-move it over to other side ,ande next to other one. - Dup. one more time = 4 layers - merge these down to each other once happy crop to fit - opaque = 900X900--DS & TR
22.) Jack -C&P as NRL - place on left side - DS & TR
23.) Mummy - R = 50% & 80% X 2-C&P as NRL -DS - place on center bottom - move beklow crysatl ball layer - TR - mirror - Dup. R= 80% place this one on top center - TR
24.) Spider Web - R =50% USM-C&P as NRL -(DS) place on right side of house - TR = Dup. -R= 50% sharpen--place on bottom of tree - TR - Dup. and mirror - place it on fence.
25.) Witch - R = 50% USM - C&P as NRL -- place on bottom left side--DS & TR
26.) Vamptini - R = 50% X 2 - USM -C&P as NRL - place this one in front of center - DS & TR - Dup. - R = 80% place on crystal ball table in front --TR
27.) Scary Butterfly - R = 50% USM-C&P as NRL -place on top right - DS & TR -- free rotate - left 25 -- Dup. R =80% - mirror - place on bottom left.
28.) Sparkle - place on bottom - move layer right above sky - =Opacity 80%--MD 
29.)  Go ahead and Merge Vivible all layers below the CB layer -- Now R = 56% = 504 X 504 - Sharpen - now add all thr copy right info and then name-- if you do not wish to animate-delete the CB layer and Merge Visible and then save as PNG.
TO Animate keep going.
30.) let's get started....-on the layers below the CB layer rename them "Bottom" Now working on the top layer - with your Preset shape tool, and with colors to accent your tube, draw an arrow-the examples for all these should be in my files..
31.) DS and rename them R=Arrows  - convert to raster layer
32.) Now open CB and close - orginal-- open arrows on bottom
GO To Animation shop- copy as new rastrer layer and paste into AS.
Repeat this by opening the close area as well --TR
do this for a 3 frame tag-- when happy-change frame properties to 45-- view and when happy saves as 80%
thank you for looking at my finished tuts.
Hugs
Angie


Sunday, November 16, 2014

October

I am sorry I didn't get any tutorials done this month. Real life did a bang up job on this family.. My BF's Mom died, we had her funeral, which she was buried on the anniversary of our Dad's passing, even though it's been 4yr's. And then we had to pack up her 3 bedroom duplex apartment, and we only had from the 14th to the 31st to have all her stuff packed and gone. Even in Death there is no respect.
And in all this we had to leave town due to, an emergency for 4 days. Oh yeah, we also had to plan a Wedding of my BF to my brother, his 1st marriage.. took him 50 yr's , about time.. huh?
Ok so my next 2 tutorials are Halloween based, sorry- better late than never...
Can't wait till things get back to order.
hugs
Angie